My Personal Shopping List
Getting Started:
Install the application
Run the application
The main screen is displayed
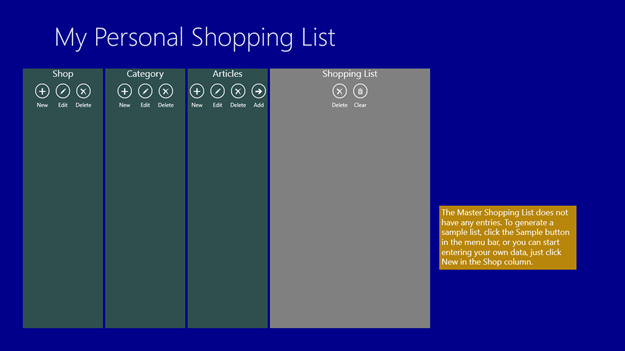
The first time you run the application, the Master Shopping List data base is empty. You can generate a starter data base by clicking the Sample button in the App Menu Bar.
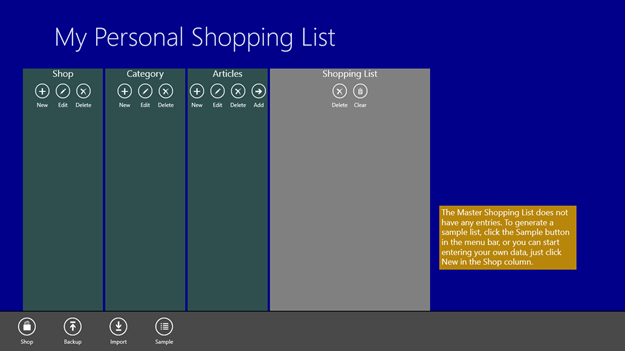
The sample data base contains a limited amount of data. It is intended to help you get started with the program. Alternatively, you can start entering your own data without generating the sample data base. The Sample button is only visible when the master data base is empty.
Using The Application
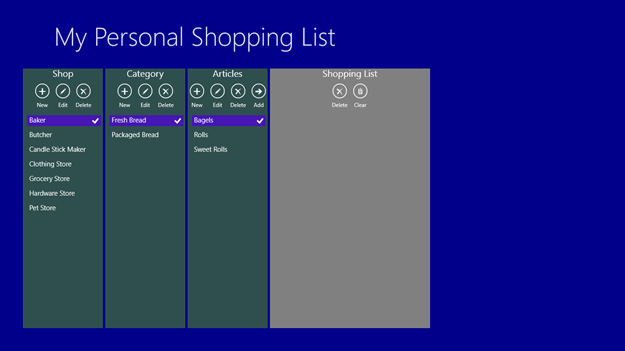
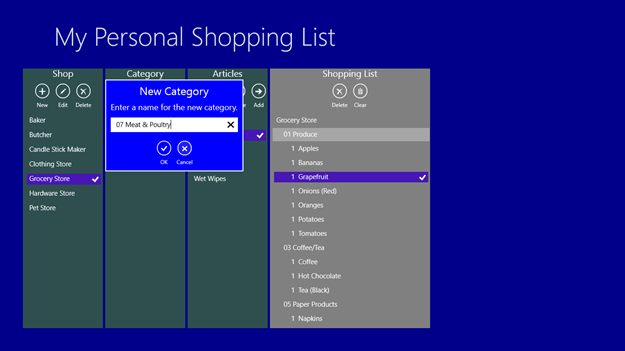
The display is divided into four columns. The three columns on the left are for the Master Shopping List data base. They show the shops where you shop, the categories (or aisles) within the shops, and the articles found in the categories. To add a new entry in one of the columns click the New button at the top of the column. For example, to enter a new category in the Grocery Store, click new at the top of the category column. A small window will open, and you can enter the name of the new category. The Edit button allows you to rename an entry, and the Delete button allows you to delete an entry. If you delete a category, then all articles in that category are deleted, and if you delete a shop, then all categories and articles in that shop are deleted.
Tip for categories: Categories should be viewed as aisles or sections of a shop. They let you group articles in the same order that you find them in a shop. You should consider putting a leading number on the category so the shopping list will sort properly for your shop. For example, the first section in your grocery shop is the produce section. Then when you define the produce category, you should name it "01 Produce". Then the second section in your grocery shop is the deli section. Then when you define the deli section, you should name it "02 Deli". You could even sub-divide sections if they are large, or it the placement of articles is dispersed. For example, the paper products aisle is a long aisle and toilet paper is at the beginning of the aisle and napkins are at the end of the aisle. Normally, napkins would sort before toilet paper and your list would be out of order. To help with that you could have a category "15.1 Paper Products" where you include toilet paper, and a category "15.2 Paper Products" where you include napkins.
The column on the right is your current shopping list. You can add an article to you shopping list in several ways. You can select the article in the Master Shopping List and click the Add button at the top of the articles column, you can double click the article in the articles column, or you can click and drag the article from the articles column into the shopping list column.
Moving Articles
If your grocery store moves an Article from one aisle to another, you can easily move the article in the data base so that it shows up in the new category. For example, let’s say that garbage bags have historically been on the same aisle as paper products, but the grocery store decides to move them to the aisle with cleaning supplies. You can click the article garbage bags and drag it to the category for cleaning supplies. The application will move the article, saving you the trouble of having to delete it from the old category and re-enter it in the new category.
You will notice a number beside each article in the shopping list. This number represents the quantity you should buy for the article. To increase the quantity, add the article to the shopping list again. Each time you add the article to the shopping list the quantity will increase. To decrease the quantity, select the article in the shopping list and click the delete button at the top of the shopping list column. You can also click the article and drag it to the delete button. If the quantity is one, the next delete will remove the article from the shopping list. To clear the entire shopping list, click the Clear button at the top of the shopping list column.
Your current shopping list is stored in the application’s roaming data area. That means that if you are using multiple computers, the current shopping list will be shared across those computers. For example, if you make your shopping list on your home computer, and then take your tablet with you when you go shopping, the current shopping list will be available on your tablet. (This requires an active internet connection, and the speed of the replication may vary.) The master shopping list is not stored in the application’s roaming data area due to size restrictions, so the master data base is not shared with your other computers. However, you can backup you master data base up to something like a USB stick and import it on your other computers.
 Going Shopping With Your Tablet
If you take your tablet shopping with you, you can change the display to shopping mode. Click the Shopping button in the App Menu Bar, and the master shopping list data will be removed from the screen, leaving just the current shopping list. As you get the items on your list, you can delete them from the list. To change the display back click the shopping button again.
Printing Your Shopping List
Printing is provided through the devices charm in the charm’s menu bar.
Copyright © 2013 James R. Stembridge